
Repotting a bonsai means re-evaluating its position inside the pot, extracting it from it, pruning its roots and replacing it in the pot (old or new) with new soil.
Said so it seems simple … in reality repotting is certainly one of the most risky and obligatory steps in the care of a bonsai.
The topic is complex and potentially very extensive, so in these few lines we will try to give some useful ideas.
WHEN: we repot when the roots of the tree have completely filled the pot and when they have absorbed all the substances present in the soil making it “exhausted”.
You will ask yourself: “How can I understand this? I don’t have the opportunity to scrutinize what happens inside the pot, nor to know if a soil is exhausted or not!“. The indication that is normally given is to repot young trees more frequently and more mature ones less frequently. Basically because the growth rates are different, high for the former, slower for the latter.
A good indication may be to repot every two years in the young specimens or three for the more mature ones. If the soil is full of roots or compact earth, we should immediately notice by observing how the water from the watering has a lot of difficulty in getting out of the drainage holes, which could have been invaded by the excess roots. Another good indicator is to look at the superficial part of the soil, if you see it slightly raised it could mean that the bonsai needs a repot.
WHY: we repot our bonsai in other to create the space necessary to form new roots, to renew and oxygenate the soil but above all to stimulate the plant to maximize the amount of root hair.
How is a root made?
The root hairs, responsible for the absorption of water and other substances from the soil, are located on the terminal part of the root; when a root is cut (or when it is injured by hitting a pebble or the edge of the pot), at least a couple of new roots will depart from that point;
the tree swells its roots to anchor itself to the ground and not suffer damage from atmospheric events.
Made these three premises, it is not so complicated to understand that the main utility of repotting for a bonsai is to stimulate the presence of fine roots and at the same time to minimize that of large and thick roots (unless they can be useful to give character to the base of the trunk, called “Nebari” in Japanese). A bonsai, “forced” to live inside a pot, will be interested in optimizing the available space.
Our aim will therefore be to encourage the development of fine roots, in terms of numbers first of all. For our tree it will mean having an ever higher number of root hairs.
A balanced root bread, in the eyes of a bonsai expert, can be obtained after several years of careful repotting: repotting regularly, pruning the fine roots and eliminating the large roots. The higher the number of fine roots, the greater the productive capacity of our root bread, and the greater the branching the bonsai will produce. More branching, more leaves, more food produced by photosynthesis. It is a kind of virtuous circle!
The most suitable soil for a bonsai will therefore be composed of small granules of compact earth (such as Japanese clay called “Akadama”) and some pebbles (such as pumice or pozzolana), which together allow to keep the soil oxygenated, drain water, stimulate the emission of new root hairs. Instead, it is not recommended to use common garden earth or even powdered clay.
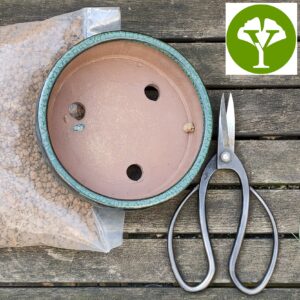
Here the main steps for repotting:
We study in advance the new inclination that the bonsai will take after repotting and we choose the possible new pot; we prepare all the material we will need;
With the help of a stick and a toothbrush, we untangle the surface of the soil by eliminating any moss that may be present and bringing to light the superficial roots, eliminating the superfluous ones;
We extract the bonsai from the old pot without pulling it from the trunk, taking care not to damage the root bread;
From all sides of the root bread, we remove a maximum of 1 cm of roots;
We insert the copper wire into the pot to free the bonsai (making it pass through the drainage holes) and then insert a layer of specific soil;
We place the bonsai on the ground in the pot, paying attention to the right inclination and height, and insert more earth around the roots;
We fasten the bonsai with the copper wire and check that it is stable;
We cover with more soil and give it a good watering;
We can cover the surface with damp moss.
Was this article good for you? You can leave a comment or ask a question (Posting will be subject to approval)